![]()
It’s pretty impressive how many options there are when it comes to decorative concrete. We have talked about various techniques in previous blogs such as concrete floors made to mimic hardwood, natural stone, or marble. Well, guess what? There’s more! That’s right, the options for ways to decorate concrete seem pretty endless. Today we’ll look at an overview of the stenciling process on concrete floors. The process varies depending on multiple factors, such as if a paper or plastic stencil is used, the type of effect you are aiming to achieve, and how the stencils are applied to the concrete (directly to the concrete or to an overlay).
Some of the more used techniques for stenciling concrete floors are:
-Using a gelled acid that won’t seep below the stencils or lightly sandblasting to create an etched design in the concrete.
-Using solvent-based dyes, chemical stains, or water to apply color before or after the stencil has been removed.
-Spraying or troweling a thin overlay on the concrete or skim coating over the stencil to create an embossed pattern.
For the best results using these methods it is recommended to use a stencil with an adhesive backing, this will prevent the stencil from moving.
When using stencils with an overlay spray-down systems work well with plastic or paper stencils. This type of system allows for logos, customized designs, and detailed borders to be applied. It is even possible to make your own stencils by cutting thin plywood or masonite with a jigsaw to create a design. Just make sure that the material you choose for the stencil is thick or strong enough not to tear when removing it.
Apply the texture coat in a contrasting color by spraying over the stencil that is over the base layer of the overlay material. It is also easier to apply staining before removing the stencil if you are planning to use stain for accents, this way the color underneath won’t be affected. Make sure that when you apply the spray that you spray straight down onto the stencil. Avoid spraying at an angle which can result in blurred pattern lines and overspray bleeding under the stencil.
It is ideal to use adhesive-backed stencils to create decorative floor designs with microtopping systems since microtoppings are applied so thinly. Once the surface has be prepared a base coat is squeegeed or troweled onto the width of the stencil. Then you adhere the stencil to the tacky base coat. Repeat until the complete stencil is laid. Next you can apply a thin topcoat (about ⅛ inch) onto the stencil with a trowel. For stenciled borders a small paint roller is ideal for applying microtopping because it allows for complete coverage without disrupting the stencil.
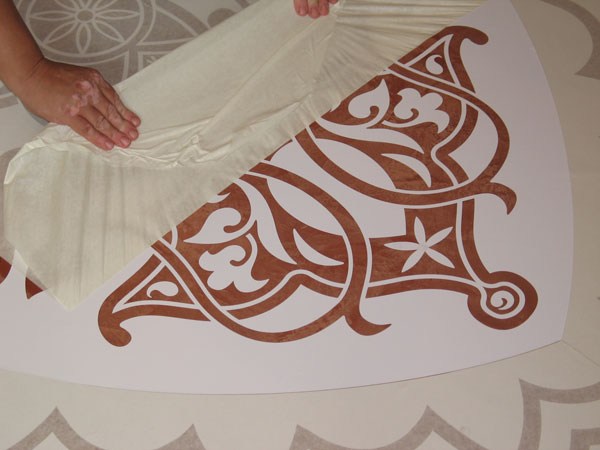
Lastly is removing the stencil. Be careful not to remove it too early or leave it on too long. Removing it too early could pull up the layer around the stencil and leaving it on too long, such as overnight, could harden and hold down the stencil making it hard to remove and potentially causing damage to the edges of the pattern. It is recommended to wait several hours, and to check the stencil by gently lifting one of the corners. If the layer on top of the corner flakes off then you can carefully remove the stencil. If the layer sticks to the stencil then give it more time then check again. Check with the manufacturer to see what types of sealers are compatible with the products used before applying the sealer. Then enjoy your new decorative floor!
There are so many creative and custom options for finishing concrete, but first and foremost important is the concrete itself. At Custom Concrete Creations we have state of the art equipment and a properly trained team with years of experience. Custom Concrete Creations is a premier contractor serving the Omaha area as well at the Midwest. Give us a call or send us an email for your custom concrete finishing needs today!
