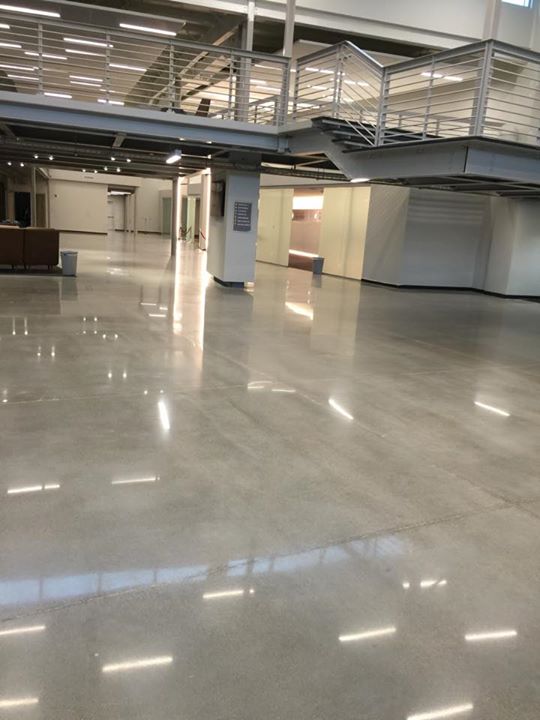

What is polishing concrete? How is it done? Today we’ll give a basic overview of the concrete polishing process. So, what is it? Polishing concrete is similar to the process of sanding wood. With polishing concrete machines are used that have diamond-segmented abrasives. The machines grind the concrete to varying levels of shine and smoothness depending on what is desired. Polished concrete floors are very low maintenance and are ideal in high traffic areas. Polished concrete floors are often seen in business settings such as hotels, office buildings, and restaurants due to the high reflectivity of the floors. Homeowners are also installing concrete floors and having them polished or stained .
The first step in polishing concrete is to identify the condition of the existing concrete. You will look for minor cracks and blemishes; high or low spots; spalling at joints; existing sealers, paints or epoxy coatings; and adhesives that remain after removing floor coverings.
The next thing you want to do is remove any sealers or coatings that exist on the floor. If any minor blemishes or if a very light coating exists the floor can usually be grinded down to remove them easily. If any thick membranes exist then the job will require a more aggressive grinding head to remove it. You will also want to fill in any existing cracks, as well as joints with a joint filler to allow the polishing heads to move with ease over the concrete.
After this has been done you can begin to polish the concrete with a coarse diamond segment to prepare the surface for the final smoothing. Typically you will use a 40-grit diamond segment for a few passes then move to a more fine 80-grit and 150-grit diamond segment. An average of two passes is required depending on the density of the concrete.
Next it is preferred to use a liquid chemical hardener to the concrete to help harden and densify it. This gives the surface extra protection from staining and penetration. This also allows the concrete to create a better polish. The hardener can be applied using a stiff bristled brush or broom. The surface should be allowed to absorb the hardener for about 30 minutes and then the excess hardener can be removed by using a squeegee. The hardener should be allowed to cure for 12 to 24 hours or as directed by the product container.
Lastly, you will polish the concrete giving it a glossy finish. This can be done to a low gloss or a high gloss finish. Typically you will begin by using a 100-grit resin bond then switch to finer grits until the floors sheen is as desired. If you want an extremely high gloss finish you will use up to a final grit of 3000. Once you have the concrete sheen to the desired level you can protect the surface by using a commercial stain-guard product. This is recommended especially if the floor will be exposed to any chemicals, grease, or oils.
Equipment and Supply Needs: Floor polisher, handheld polisher (or walk-behind edging tool), a diamond segmented abrasive set, dust collection equipment, epoxy filler, chemical hardener, and a topical stain-guard treatment.
At Custom Concrete Creations we have state of the art equipment and a properly trained team with years of experience. Custom Concrete Creations is a premier contractor serving the Omaha area as well at the Midwest. Give us a call or send us an email for your custom concrete finishing needs today!
